The Importance of Soil Testing before Building Construction
Analysis of the soil is the first step in construction planning for any building. Soil Testing is responsible for bringing about the soil’s physical and chemical nature that the structure is to be built upon. The soil properties determine the construction planning and methods and can also effectively impact the design of the structure built on it. Thus, reports from the soil test become the base for structural planning and floor plan for the construction.
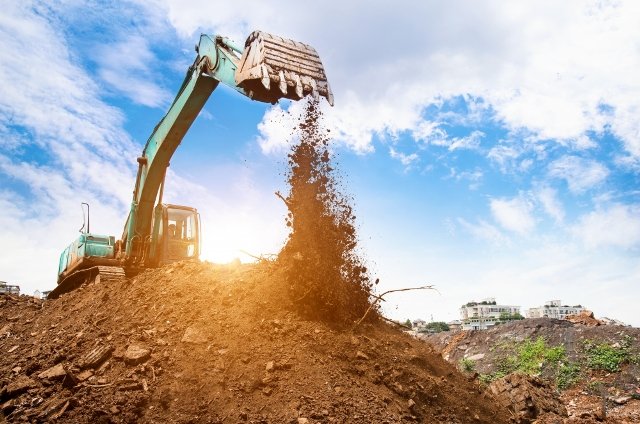
Soil is the primary element that bears all the weight of the structure, and hence it is an essential requirement to test and assess all of its characteristics. A properly conducted soil test ensures that there are no shortcomings in the design. Not testing the soil properly can result in disastrous results. The building can develop cracks, or in the worst case, collapse.
Many such mishaps occur every year, causing irreparable loss of money and, of course, life. In most such cases, soil tests were often ignored and poorly done. The Leaning Tower of Pisa is a classic example of what could happen to a building if the soil hasn’t been tested correctly before the construction.
When is soil testing done, and who does it?
Soil testing can be done anytime, but it’s quite a costly affair. The process requires specialized tools. Therefore, most people prefer getting the soil tested right before the construction begins. However, it’s always advisable that one gets the soil test done before buying and registering the land, if the seller allows that, of course.
The soil test is performed by a soil engineer in a soil testing lab. These labs can be private or state-run. Soil engineers are Civil Engineers who specialize in Geotechnical engineering and have to clear certain examinations in order to get licensed for soil testing.
The process
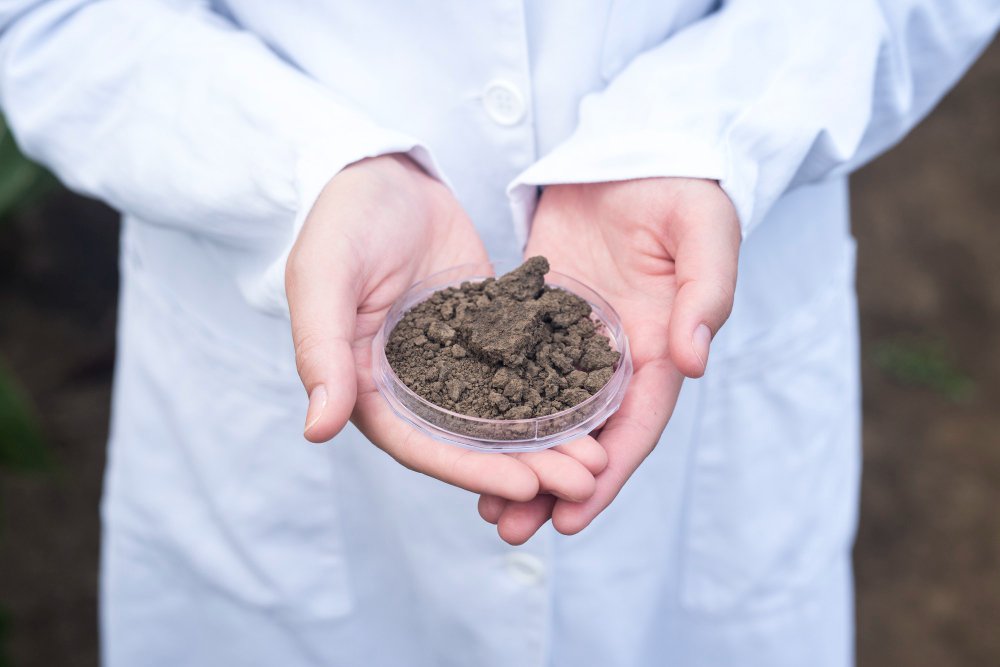
Generally, the engineers arrive at the site with their team and tools. Their purpose is to dig holes in the soil and collect samples. The holes are mostly not deep and can be easily dug with hand tools. But depending upon the soil type, sometimes a hole of even 7-10 feet may be required. Samples are then taken to the geotechnical labs, where they are tested. After the testing, the soil engineer(s) will make recommendations based on the test findings.
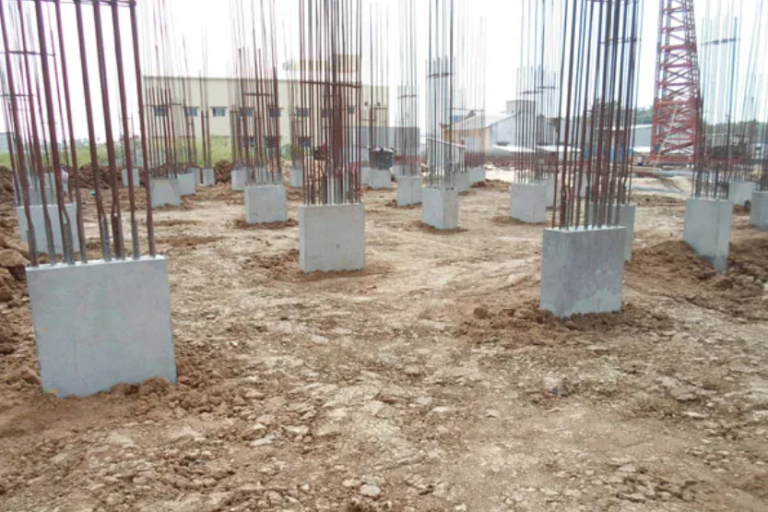
Recommendations can include many points based on the factors like composition of the soil, reactivity, salinity, moisture, and much more. Their recommendations can be anything from the required depth for the foundation to the changes in the building’s entire design. The strength and stability of a building can be drastically affected by the properties of the soil.
Hence, the soil test report’s directions and recommendations should be religiously followed while making the construction plan.
Types of Soil tests
The soil samples need to be tested for various quality factors to determine the soil’s suitability for building construction. Here we look at some most important tests conducted on soil samples to assess the soil’s characteristics.
Moisture Content Soil Test
Moisture plays a crucial role in determining the weight-bearing capacity of the soil. It can also tell you a lot about termite infestation possibilities. Moisture is defined as the percentage of water in the soil, also referred to as the soil’s water content.
It is calculated as the ratio of the weight of a moist soil sample to the weight of the sample after it is dried. Low moisture equals better strength of the soil. Following methods are used for testing the moisture content for the soil:-
- Oven Drying Method.
- Torsion Balance Method
- Calcium Carbide Method
- Sand Bath Method
- Pycnometer Method
- Alcohol Method
- Radiation Method
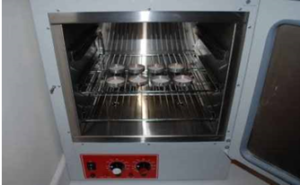
The Oven Drying method
It is the most common and most preferred method for moisture content tests. The moist soil sample is put in an oven and heated at around 110 degrees centigrade. The dried sample is taken out after 24 hours to be weighed and compared with the moist sample’s weight.
The amount of earth sample required for the test is governed by the particle size and gradation of the soil sample. On the basis of the sieve analysis, the table below shows the quantity of the soil sample required for the test.
| Size of particles more than 90% of passing | Minimum Quantity ( grams) |
| 425 micron sieve | 25 |
| 2 mm sieve | 50 |
| 4.25 mm sieve | 200 |
| 10 mm sieve | 300 |
| 20 mm sieve | 500 |
| 40 mm sieve | 1000 |
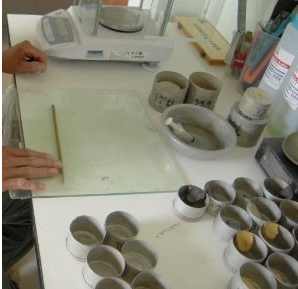
Oven Dry Method Procedure
The Oven Dry Method has the following steps:
- First, clean the containers and dry them. Weigh each container and jot down each container’s mass (M1). The weight of each container to be noted and given a number.
- Collect the soil sample by removing the top layer of soil. Collect the wet soil from the bottom layers.
- Fill the containers with the necessary amount of the soil sample and weigh each container and note down its mass (M2).
- Place the containers in the oven. The temperature should be set at 110o ± 5o C and allow them to dry for 24 hours.
- Turn off the oven after 24 hours. Take out the containers safely using tongs.
- Cooldown the containers in desiccators for an hour.
- Weigh the containers and note down the mass (m3) of each.
- The water content of the given soil sample is calculated by the following formula:
![]()
Here, M1= Empty container’s mass with the lid
M2= Container’s mass with wet soil and lid
M3= Container’s mass with dry soil and lid
2.Specific Gravity Soil Test
The specific gravity of soil is the ratio of the weight of the soil sample volume to the weight of an equal volume of water. It helps knowing how porous the soil is. 2.65-2.85 is the ideal range of soil specific gravity for constructional purposes. Some of the popular methods for specific gravity test are:-
- Dry Bottle Method
- Pycnometer Method
- Shrinkage Method
- Gas Jar Method
- Measuring Flask Method
The Pycnometer method and the Dry Bottle methods are the most preferred and easy.
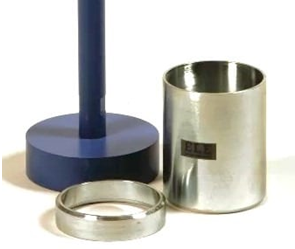
The Pycnometer Test
In this method, a device called a Pycnometer is weighed in 4 different cases, that is:
- Empty weight (M1)
- Empty + dry soil (M2)
- Empty + water + dry soil (M3)
- The water-filled Pycnometer (M4) at room temperature.
From these 4 masses, specific gravity is determined.
3.Dry Density Soil Test
Dry Density can be defined as the weight of soil particles in a given volume of sample. Two factors on which the dry density of soil depends are Void Ratio and Specific gravity. The values from the dry density test help us classify the soil as dense, medium and loose.
Dry density of the soil can be calculated using The Core Cutter Method, Sand Replacement Method and the Water Displacement Method.
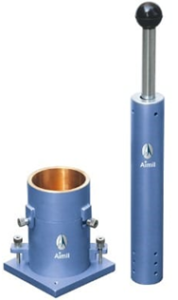
The Core Cutter Method
In this method, a soil sample is cut and pulled out with a cylindrical core cutter of standardized dimensions. The collected soil sample is weighed and noted. The water content for the sample is calculated and dry density is determined. Let’s have a look into the procedures of the Core cutting method.
The Procedure of Core Cutter method
- Measure the internal dimensions of the core cutter to calculate its volume.
- Determine the core cutter’s weight (without dolly).
- With the dolly placed over the cutter, drive the cutter into the soil with help of the rammer.
- Bring out the cutter with the soil sample.
- Take off the dolly and trim off the excess soil above the edges of the cutter.
- Ensure to take the weight of the cutter filled with soil.
- Take some representative sample for determination of water content by the oven.
- Repeat the test for at least two-three locations to find the average density.
Observations and Calculations of Core Cutter method
(A) Determination of Field-Density
- Wt. of the core cutter (g)
- Wt. of the cutter+wet soil (g)
- Wt. of the wet soil (g) (2-1)
- Volume of the core cutter (cm3)
- Field density ϒ= (3)/(4) (g/cm3 = (kN/m3)
( B) Determination of Water Content
- Container No. (g)
- Wt. of container+moist soil (g)
- Wt of container+ dry soil (g)
- Wt. of container (g)
- Wt. of water ((7) – (8)] (g)
- Wt. of dry soil [(8)- (9)] (g)
- Water content w=(10)/(11) (ratio)
- In-place dry density ϒd=ϒ/(1+w) (g/cm3) = KN/m3
Here, w = Water content Dry density ϒd = ϒ/(1+w)
The Sand Replacement Method for Dry density testing
In the sand replacement method, the soil is excavated to create a hole in the ground whose dry density needs to be found. This hole is filled with uniform sand whose dry density is already known. Thus, dividing the mass of the sand by its dry density gives the hole’s volume. We can calculate the dry density of the soil from the formula mentioned above.
4.Atterberg Limits Test
This test unveils the critical water level of the soil. The test provides three limits that present the attributes of a fine-grained soil sample in different conditions.
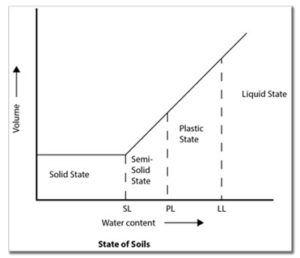
The three limits are:-
Liquid Limit test
A device called the Casagrande’s liquid limit device, is used for this test. The device consists of a cup equipped with a mechanism to move up and down. The cup is filled with the sample in question. A groove is created in the sample using specialized tools. The groove becomes closed at a certain point when the cup is moved up and down, using a handle. The number of times the handle is used to close the groove is noted. Then the water content of the soil is determined.

The procedure is done 3 times in order to draw a graph between log N and the water content of the soil. The water content that corresponds with N=25 is the liquid limit of the given soil sample.
Plastic Limit test
Add some water into the soil sample to make it plastic enough so that it can be shaped into a ball. After some time, put the ball in the glass plate and roll it into threads of 3mm diameter. If there is no crumbling of breakage while we roll it to below 3mm diameter, it means that the water content is more. In such a case, we need to reduce the water content in the sample and repeat the process until breakage occurs at 3mm diameter. In the final step, find the water content in the resultant sample. The water content thus determined is the Plastic Limit of the said soil sample.
Shrinkage Limit test
When determining the shrinkage limit, the water content of the sample is just enough to fill the gaps in the soil. The saturation degree being 100% here, there will be no change in the volume of the soil if we reduce the shrinkage limit. It can be determined by the following formula:

Here, M1= Initial Mass, M2= Dry Mass, V1= Initial Volume, V2= After Drying Volume, Pw= Density of Water
Compaction or Proctor’s Test
Compaction of soil is simply the process of densification of the soil by compressing the air voids. The test aims to provide two crucial factors: the dry density of the soil and the water content. For the test, the soil is extracted with the help of standard-sized sieves. The extracted soil sample goes through a set of processes like mixing, moulding, wetting, and ramming. The end product of the process is weighed and tested for different results.
Conclusions
Though, Soil testing before construction is a must, the requirement is different for different soils and also varies according to the requirements of the projects. In a bid to make money, many contractors follow the practice of not conveying the customer with the proper information as per their requirements. Many can also suggest simply ignore the process if the customer insists.
Knowledge plays a crucial role. The importance of soil testing can be understood by the fact that at most places around the globe, governments have made it a compulsory process by law and pass the building’s construction plan only after one presents them with the soil test report. Still, many people, in a bid to save some money, or, just because of unawareness and ignorance, skip this process. The end results of such cases are mostly fatal. Getting the soil test done is the first step towards a long and safe future.
Contact Samruddhi today for the right information and invest our time and money wisely. Lets us take care of all your construction worries.